First of all, I am not a creative person. However, they say that necessity is the mother of invention and in my case, poverty was the mother of creativity. Recently, I decided to furnish my empty house in Lewin’s Cove on a limited (some might say “non-existent”) budget. So I spent weeks on Kijiji and browsing thrift stores for good deals. Then, armed with a few cans of spray paint, some chalk paint and a quart of polycrylic, I performed some magic! Here are some of my befores and afters.
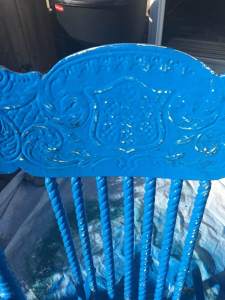
Project 1: Rocking Chair. When I saw this antique rocking chair on Kijiji for just $10, I knew I had to have it. This chair had been in the lady’s family for over 100 years, which was evident by the many coats of paint. One tin of blue spray paint ($7.99) and a couple of coats of polycrylic, and I had a piece that I will cherish forever! (Note: Polycrylic is a water-based clear coat finish. It costs about $20 a quart, but it is enough to finish many, many projects. It is a great finish for chalk paint and a much easier option than wax.)
Before
After
 Before finishing with polycrylic, I distressed it with a piece of sandpaper, to maintain the antique look.
Project 2: End Table. My daughter, Kaitlyn, was throwing out this little table, and I thought it would make a nice addition to my entrance way. I spray painted the top and chalk painted the legs white.
Before
 After
After
Note: I spray painted the handle black.
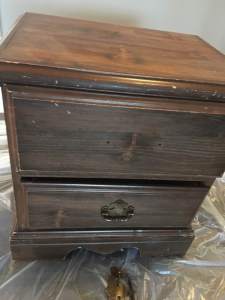
Project 3: Nightstand. Some things, like my rocking chair, are truly antique. Some things, like this night table, are simply old and out of style. However, once again, my spray paint worked it’s magic and I have a modern, very heavy solid wood night table. I used a high gloss spray paint ($7.99) which did not require a finish. The table cost $7 at Value Village.
Before
 After (note: I spray painted the handles again. One tin of black spray paint finished many projects!)
I used this table in my half bath, as a place to store towels. The jug I got at a yard sale for $1. The picture originally had a green and burgundy frame, which I spray painted this lovely aqua color, left over from my end table make over above!
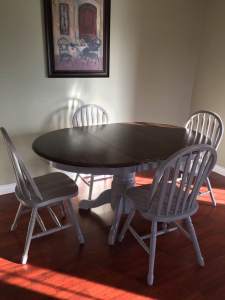
Project 4: Dining Room Set. Who amongst us did not own an oak set like this in the 90’s? Most of them have been sent off to university with our kids, or to our cabins. However, it is solid wood. They just don’t make them like this anymore. I got this set on kijiji for $80.
Before. Note: I had taken out the insert at this stage and used paint remover to take off the varnish. For the chairs, I used chalk paint so no need to remove the original varnish finish since chalk paint will stick to anything.
After. The chairs and base were painted with chalk paint, finished with polycrylic. For the top, I used a rag to apply dark stain after it had been sanded down. Then I added several coats of polycrylic.
After close up.
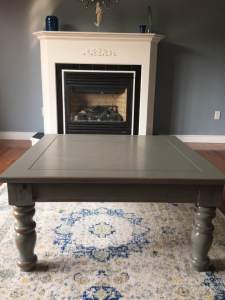
Project 5: Solid oak coffee table. What a find! A big, heavy, coffee table for $25. Two coats of chalk paint, a bit of distressing with sandpaper, and once again, finished with polycrylic. I also used a hammer to put a few dents and scrapes in it before finishing, to add to the distressed, antique look.
Before
After. Note: I used country grey chalk paint.
Project 6: Lamps. I have had these lamps for about 15 years. It did not really cost me anything to re-finish since I already had a tin of black spray paint. The shades I painted with two coats of white, latex paint.
Before (beige and gold) and After (modern black and white) side by side.
Project 7: Fireplace. Of all my projects, this is definitely my masterpiece! How to give new life to an old fireplace? Paint! I used white melamine, which took several coats, but in retrospect I would have used white chalk paint, which is much less work, and finished with polycrylic. The bricks I painted with a heat resistant paint. Notice how even the wall color looks nicer in the after picture.
Before
After
I don’t have a before photo of my living room, unfortunately, but just imagine brown fireplace, brown coffee table and beige walls. With some paint and a bit of elbow grease, the room was completely transformed.
I have to warn you, once you start doing these projects, it becomes addictive. I am currently trying to wean myself off kijiji since I have no room for more makeovers.
Where do I get all of my patience to finish these projects, you ask? I meditate! If you live in the St. John’s area, and would like to try out a free meditation class, I am offering one on October 22nd. Register here:
https://www.florencestrang.com/upcoming-workshops


WoW….. just WoW…. That fireplace is so beautiful and you are right about the paint in living room. Great job on all projects but I do love the fireplace.